


I pinned these:

Source: homesteadrevival.blogspot.com via Jennifer on Pinterest

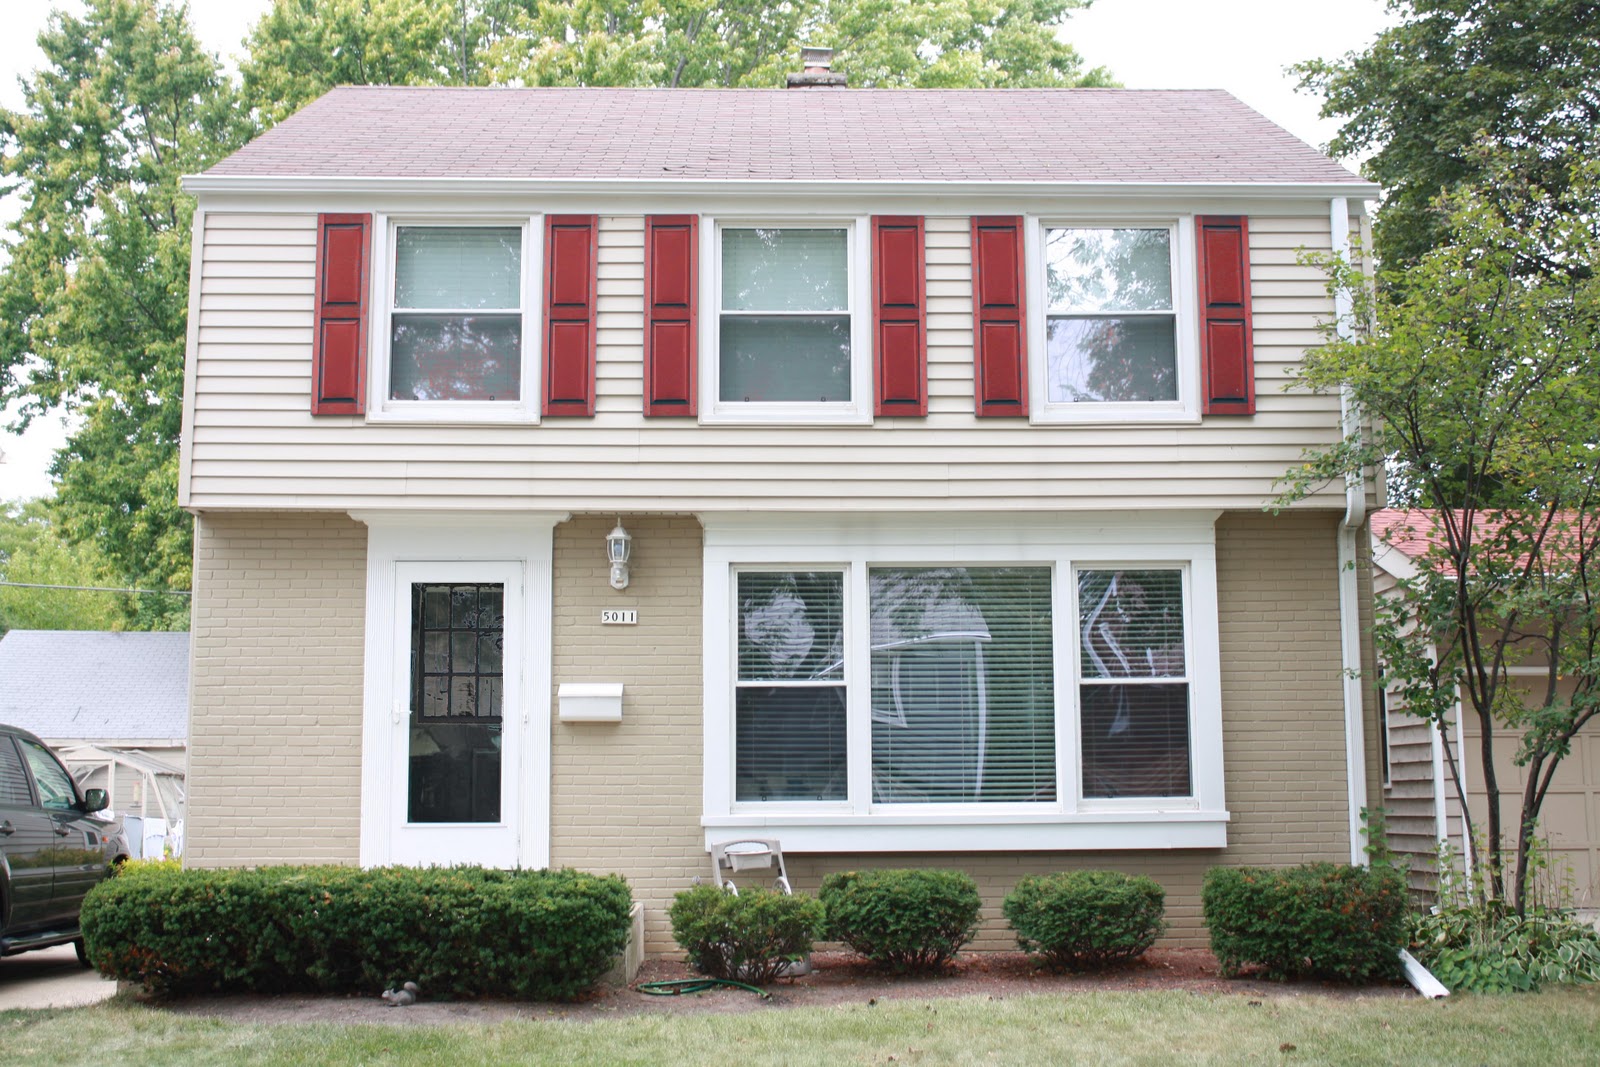
And I started out with this:

which wasn't terrible, but it wasn't us. So it was high time we did something about it. So Hawk and I threw a few mock-ups together on photoshop.

black shutter black door
red shutter black door

strange blue that Hawk likes shutter and doors

strangely patriotic Hawk-combination of blue shutter red door

monochromatic grey-brown (but not really greige) shutter and door

red shutter red door
We finally decided on a red door with gray-black shutters (not pictured). Hawk created the cottage shutters I've been dreaming of since before we bought a home. more on those homemade shutters and why they're not hanging on our house in a later post. I ran through 13 different kinds of reds at Home Depot (using Behr samples; more on that in another post on different paint qualities and why I would never use Behr exterior if we had a bigger budget and higher-quality doors). I painted a 2x3 foot swatch on some scrap wood I grabbed from Home Depot at $0.30 a piece, painted swatches on both sides, and held the scraps in the doorway so we could see what the reds look like in different lights and behind the door.
Pause with me. We do not have a wood door. Most painted redos I see online or around town involve wood doors. We have a steel front door and aluminum storm doors with some plastic parts....I hate plastic now.
Most said we couldn't paint a steel door. I think that's silly, so we did it anyway. to save you the anguish of making any mistakes we made, follow these simple instructions.
ONE Test every part of the door to see what material it is. Put a magnet on it; if it sticks, it's steel; if not, it is aluminum. If it's plastic, replace the door. You're not getting much for your money. Just sayin'.
TWO Get the appropriate primer for the various materials. You will need different primers for different materials on the door!
Here's where we ran into mucho trouble. If you notice, our door has a window pane thingie. That thingie is made of plastic. I did not realize this until after I'd primed it with steel/metal primer. Twice. And 4 coats of paint. And then, it shredded off the door right before my eyes. I'm still peeved about it.
Here are the primers I chose based on 2 days of research and numerous conversations with Sherwin-Williams guys. I highly recommend going to professional paint stores like Benjamin Moor or SW to inquire about these things. You can always use cheaper paint from HD like we did if you don't want long-lasting quality (we only need this to stay put for another 3 years at most, and then we hope to completely replace the doors and door frames).

X-I-M Primer found at Sherwin Williams, with a coupon
SW Multi-Purpose Latex Primer, for the plastic, at SW with coupon
The primer on the left is good for metal surfaces. The primer on the right is good for plastic surfaces.
THREE Wash, wipe, and dry every bit of the door's surface. Begin to prime 10-30 minutes after to allow for drying time and to eliminate further dirt and dust build-up from outside.
FOUR Remove any scraps of caulk. You can't paint over this. I used a regular scraper and had it done on the two doors in a matter of 15-20 minutes.


FIVE Tape the areas you want to keep free of paint. Though you can't see it here, I taped around the edge of the door and the door handle. What you can see is that I also taped the window pains. I wouldn't do this again and in fact, on the front door, I didn't do it at all. It's easier to scrape the paint off the glass than to set and rip tape off. Also, since the doors need multiple coats the tape, once pulled off, may bring much of that paint with it. I used Frogtape here, and I'm not that impressed. I don't see much of a difference between it and regular blue painter tape.

SIX Prime the door. I used a paint brush for the window pain and around the doorknob (if I did it over, I would have removed the doorknob right away). I used a foam roller for the door face and bevelled areas. I can't recommend this enough! BUT, be careful. On the fourth coat, I had to use a new roller and I grabbed one from SW store---terrible. The type of roller was clearly not meant for smoother surfaces. It left lint and pieces of itself all over the door. Yuck.

The roller itself is about 3.5" long. Perfect for this size door. About $4 with the handle at HD. I used the same model for the red paint and primer, though washed out and let to dry overnight. That is a must or the water dilutes and thoroughly undoes the work you've managed the day before.
SEVEN Paint the area. I found multiple tutorials about the direction in which to roll, what to paint first, etc. Overkill. I simply start at the top and work my way down, making sure that I never leave an area for long before adding to it so that there aren't lines in the paint (again, more on that in a later quality-of-paint post----Behr bites at this). Here's the back door after the first coat. Brighter red than the final result, but very happy overall.


EIGHT Paint or replace hardware. After I worked on the four doors (2 steel, 2 storm), I also sprayed the hardware using the same method I used for our kitchen hardware. You can see in this picture that it needs another coat or two in a few places. I found it also needed ample drying time in a warmer location than our Wisco basement, but what can you do. It was definitely dry after 3 days back on the door. If you follow the same method, be aware of the drying and recoating time. I put three coats on within 24 hours, and then put them on the door so we didn't blast our heat through the hole, and I'm added another 2 coats this weekend for a finish. Note: the red is awfully cherry in this shot.

Here's the almost-finished product. I have to scrape the front door's glass yet and Hawk has to scrape the back door's pane so I can repaint it. I hate that very thought. These are untouched photos, so they look darker than in real life, but you get the idea. I also chose to leave the inside of each door white so the look is consistent to a given degree.


Forgive the less-than-proper hanging of wreath method. Sometimes, ya gotta work with whatcha got.
So there we go! Hope I didn't leave any steps out, but let me know if I did.
When I've scraped, we'll show you a post of the whole house. It'll be really nice when we get some snow on the ground. People already comment on how much more inviting it is than the evergreen was. And it's definitely more us. I wanted a black door, but the red was the right decision.
Happy Wednesday!
icj,
~j


LOVE it! Every time I drive past, I smile. Makes me want a red door real bad! {please feel flattered if I do, in fact, copy you one day!}
ReplyDeleteOh! I really like that red!! It looks great!
ReplyDeletedoes Cormac assist in home projects???
ReplyDeleteNellie, by all means, go red whenever if ever you want:) I'm so happy with it. A smile comes to my face every time I walk back in, and when the door is open on the inside, it just adds warmth and color to the room.
ReplyDeleteThanks for the encouragement!
~j
Thanks, Kirsten! You were my catalyst for getting this post up and at-em!
ReplyDeleteJen, I do most of this sort of thing during naps, though when it was warmer outside and Cormac wasn't yet crawling, I did a little when he was awake and basking in the sun on the front lawn. But then it got chilly and he got mobile and very very curious...I'm sure you know where that goes.
ReplyDeleteHug that little one for me!
`j