Showing posts with label furniture. Show all posts

8.29.2012

to start : we're building a kitchen nook

It's gonna happen because it has to happen. Our galley kitchen is rather small, say 120 square feet, and it's had at least two eat-in areas that I know of. The previous owners thankfully removed a bar-height double-stool counter that faced the dining room, backs to the south-facing window (fools!). We've been using a small table and chairs for anything but eating. It's become the dump-all, and we all hate it. Waste of space, waste of furniture, and totally unhelpful for all those kid paintings I want to make with, well, the kids. And if you know anything of kids, which I'm sure everyone does, then you know this is bound to happen unless you have a proper area.

Here's a flashback to the kitchen we purchased, and a bit about what we did with it the first 4 months.
We did a lot of cosmetic work, and then it looked like this:

And it mostly looks like that today, with minor tweaks.

Here's the area in question:
We've since removed the two garbage cans, and the table area is never that clean. Just sayin'. Never.

Here's what I'm looking for with the kitchen nook:
  1. Seating for 4-6 adults, 5-8 kids
  2. Something that looks like it fits
  3. A pedastal table for greater legroom
  4. An overhang so that legs can kick back, swing, etc. without hitting the bench itself.
  5. An area for coloring, painting, snacking, help with baking, homework, etc. 
  6. Not the place we really eat meals (we really like using our actual dining room for that!).


And this is another option, a bracketed bench. I'm hesitant about the added cleaning space underneath, and I prefer the permanency of the previous two looks, but this is a great alternative.


I tried something and it failed. And then I found this light tutorial and it hit me, I was trying too hard for something so simple. There's a better way.


Mom Hawk is on board to help, and Hawk and I are hopefully evicting the current table and chairs this week (to the Hawk-family lending circus we call Mom Hawk's basement storage room).

We figure we can build our whole piece, minus paint, for under $100. Seriously. If not, we'll fail and you can enjoy the results. Either way, I'll have my dinging nook!

Anyone else tackle something like this? Anything I should know?

icj,
`j

8.23.2012

living room redo : built-in bookshelves & bench

Since the day we moved into this house, I've wanted to build bookshelves and a bench along one living room wall. Three years later, it's done! We thought about doing it ourselves because I was able to complete this bench with Mom Hawk in one day, but with the addition of little people, we didn't think I'd be able to pull it off to the degree of quality we want. (Hawk isn't as interested in building things as I am).

We are lucky enough to know a great carpenter team, father & son, Jeff & Jamos Hurst of Alpha Home Builders. They go by word of mouth, so I can't even link you to their website! They worked on our basement most recently, and we were only too happy to have them complete this vision.

Speaking of vision, this is one of those times Hawk and I really differed in what we envisioned and Hawk was generous enough to concede to my idea. He preferred a floor-to-ceiling look, and I wanted wall space above the shelves for paintings, lamps, and showcasing things we love. I thought a total wall of shelves would be overwhelming in our small 21'x12' space. He just asked that I give him a visual.

A visual. Should be easy, right? We live in the age of Pinterest and Google, so any image should arrive at my slightest whim. Wrong. I couldn't find anything that exemplified what I wanted to create. Apparently everyone else wants floor-to-ceiling coverage in some form, be it closed doors, tvs, etc.

Here was the best I found, and it's pretty good except for that ugly weird non-congruent shelving and the total over-decorating of that mantel:


Source? anyone know?


You do what you can with what you've got, right? So with Hawk's approval, I sent Jeff the following pics. Get ready, these are sweet.


And after meeting a few times, we scheduled the big day. Hawk and I took off for the weekend with the kiddos to avoid the dust, noise, and general chaos. After a day, we received a few iphone pics. Here's the progress!


A few things came up during construction that I figured were standard, like adding a wood floor to the bench. Since this had become a more permanent feature to the house, the carpenters didn't see the need, but I knew I was going to throw some heavier things in here like poker sets, games, and toys. 
They added my divider, a floor, and extra support along the lid. I especially like how the lid is nestled rather than extending to the edges.
Thankfully, Mom Hawk was in and out throughout the weekend. She caulked for us, painted, and primed before we got home! How sweet is that!!!

I wasted no time in throwing things up there. So to be honest, I don't have a lot to show you of the finished product because I'm not that keen on how I've "styled" them, but hey, they're working for now, right?
A couple of my requirements were plenty of space for art and objects as well as two compartments in the bench.

About the bench, I've envisioned our kids curling up on a rainy day to read a book on the bench. So it had to be deep enough to actually lounge on. This puppy is 24" deep! Aside from all that great storage, it's really nice for relaxing. (Though, if you note, in the photo the lid is missing. We're having a special hinge installed so that it can't slam down on small siblings' heads when their bigger brothers/sisters are mad).
A little trim detail. I wanted deep top shelf. Jeff was able to extend the top shelf about 4" beyond the shelf frame. I think it gives the impression that these are original to the house, and it gives me a depth of 20" on top.

And a view from across the room:

Built-in details
Shelf height: 60"
Shelf depth & width: 20" x 48"
Bench height: 22"
Bench width, depth, height: 48" x 24"

Professional supplies & work, minus caulking, painting, priming.
Supplies: $400
Labor: $1000

Surprised? Now, we worked out the price as a DIY as well as an Ikea hack, and both produced less-permanent qualities at a very similar price. There was no better way for us to get the built-in and shelf work done in such a way. So we're really really really happy with it though we were, at first, surprised at the price tag! In the end, we realized we got a great deal (it cost about $200 more for supplies, but he didn't charge us for it after the estimate).

We've observed that it really changes the room! The focal point is still found in our front windows, but this grounds and lightens the space. And hey, the storage is nice, too. And I appreciate that we don't need to secure anything to the wall.

So, friends, what do you think? Have you done any built-ins or do you already have them in your space? Would you change anything about them?

icj,
~j


8.09.2012

take it from us : removing stains from furniture


Egads! It's happened to you! You find that your friend, your kid, (you), has spilled something on your couch. The panic sets in. Gone are the days when you can just turn that cushion over because, hey, you got it off the curb anyway. You are an adult now. You have to do something about it.

When Hawk and I took the plunge and recently purchased a new rug, two new lounge chairs (they are seriously cool) and a new sofa, we said no eating, drinking, coloring, painting, or shoes allowed in the living room. And two weeks later, we had 2 marker events and one lunch-that-didn't-stay-down. Yikes.

Most recently, the little guy brought his dry-erase markers from the kitchen play area into the living room. I heard no no no dawing and knew that at that very moment, he was doing the very thing he told himself not to do. (What a parody of the human soul!) I rushed in to find that the painted wood window seat was covered in orange marker, and yes, heavens fall down, one of the couch cushions.

Hawk was going to kill me. Slowly.

Mom Hawk has said time and again that if we get spills on furniture to do the following. I can now say that having performed the remedy 3 times, it is entirely successful. We have removed marker, vomit (just a wee bit, friends who-come-over-and-sit-on-our-furniture) and coffee (mea culpa) in the last three weeks. Let me tell you how it's done.

you need:
a FRESH stain -- can't be allowed to set, so break out the goods while the guests or there or plan to explain that stain later, like THIS:
1 cup lukewarm-to-slightly-cold water, container w/ pourable spout a plus
a Shop-Vac
a sense of humor and humility
buns of steel (just kidding, it came to mind so I wrote it)

NOW DO THIS:
1. RESIST the urge to wipe/mop/press on the stain. Walk away now. Count to ten. Resist.
2. Get the shop-vac
3. Remove the bag (or it will get water inside and will mold and rip)
4. Put it back together (sounds obvious, but hey, you never know)
5. Get some water in that snazzy container

6. Pour a very small amount of water over the stain, just enough to cover the surface, and not enough that it will soak beneath the first layer.

7. Shop-vac the water/stain area.

8. Repeat with 6 & 7 until the stain is gone. If it's not out after 3 dosings, you're stuck with it. What did you spill???

Also, I found one set of dry-erase marker on the back of the couch days after it must have happened. It's still there. Shucks. So the #1 step is the most important--catch it while it's fresh!

So there you have it friends, a tried and true way to remove stains. We've used the same method on our new rug (coffee...) and it was spiffy. Just spiffy.

Let me know if you have to apply the method. I will both commiserate and give you made props.

Happy Thursday!

icj,
~j


3.28.2012

check this out :: transforming furniture

We all love Ikea for its affordability, simplicity, and easy style, but this stuff takes the cake on the ability to be transformed with a few finger pulls and swivels.

Seriously, this stuff blows my mind. I'm trying to figure out how to get some of the folding-desk-bed things in my dining room. Just kidding. I meant bedroom, of course.

5.02.2011

check this out

I'm back from retreat (I'll tell you how it went later this week) and I'm itching to start a home project. Hawk spent the weekend tearing up our lawn and replanting grass, moving a few flowered plants around, and generally being manly.

Here's my next project:
I grabbed it from our neighbors dump pile (shhhhh, they're right next door) last summer. It was just too good to pass up. And for those of you who know about our flood x 2 events in the Milwaukee area summer 2010, dontcha worry---this was not in a flooded basement. Though our street flooded, our block did not. Our living room did, but that's another story.

I wanted to keep the board form to create a new butt-frame (or whatever you call it) but it was in really bad shape. I was preggers at the time and didn't want to breathe anything in. Heck, I'm still glad I tossed it. I still don't want to breathe it in.
The stuffing was messy and torn.
 Yuck. Mold. At least you can see where the previous owner was able to re-do the fabric.

So I plan to paint it and create a new butt-frame with a fun fabric. Here are a few inspiration photos for ya. I'm really drawn toward what I labeled the "chair most similar" and the "lovelovelove." Which do you like more? White frame or dar?


Happy Monday! It's great to be back. 

icj,
~j

10.20.2010

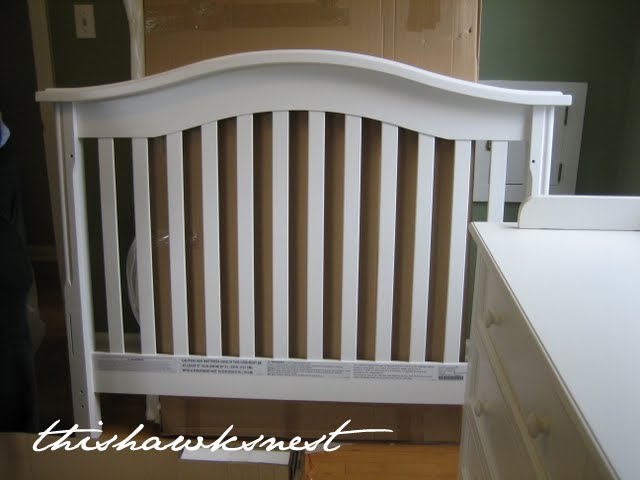
We've been hard at work on Ace's room. Another crazy work week, so here is a photo run-down of the work Hawk put into setting up the crib and dresser. I helped hold a few things in place, which is why there aren't as many working photos, but you get the idea.


What a handy hunk, don't you think?

icj,
~j

9.27.2010

nursery nesting

We've been getting the question, "Have you set up the nursery yet?" quite a bit these days. And with work heating up (Sept.-Nov. are the busiest months of the year for me) and Hawk traveling for work soon (Vegas, baby! Ve-gas!), we felt we needed to make a few decisions and get down to it.


Mom & Dad Shedd gave us our crib and dresser as our big baby gift (thank you!!!). VERY exciting. We also like that what will house our little one came from our parents. We knew we wanted white, and we knew that the lifetime crib, or 3-in-1 crib, was the best idea for our long-range family plans. In other words, why end up with a crib in 10 years when you can have a full-size guest bed? 


And yes, I said 10 years. This gal's 30's are hopefully going to be all about the bebes.


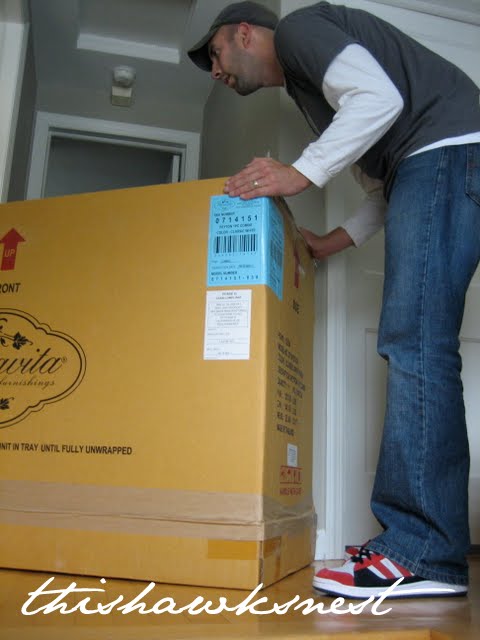
So here are the crib and dresser we chose. The crib is Bonavita Hudson, and the dresser is Bonavita Peyton. We were able to score them with the mattress for a sale. We researched, and we're pretty sure we got a crib that won't be recalled, will last for the next decade or more, and won't fall apart after years of us leaning into it to make sure the kiddos are still breathing. 


This weekend, Hawk and Dad Hawk picked them up from across town. Halfway through the move, Dad said, "Get the camera! This little bugger needs to know what it took to make him comfy!"

So I did.

This is the dresser. It weighs way more than Hawk and could have housed a carnie family.


Taller than some of our children may ever be--with my great tallness genes going for them...


And a proud stance for a job well done!

Who knew it could take so much effort? We'll keep you updated as nursery nesting continues. And I love that while nesting is a normal way to say it, it sounds cooler in a "hawks nest" blog...

Happy Monday, everybody!

icj,
~j & Hawk

LinkWithin

Related Posts with Thumbnails
 
Real Time Analytics